.svg)
Klaviyo Shopify Integration: Setup Guide + What Most People Get Wrong
.avif)
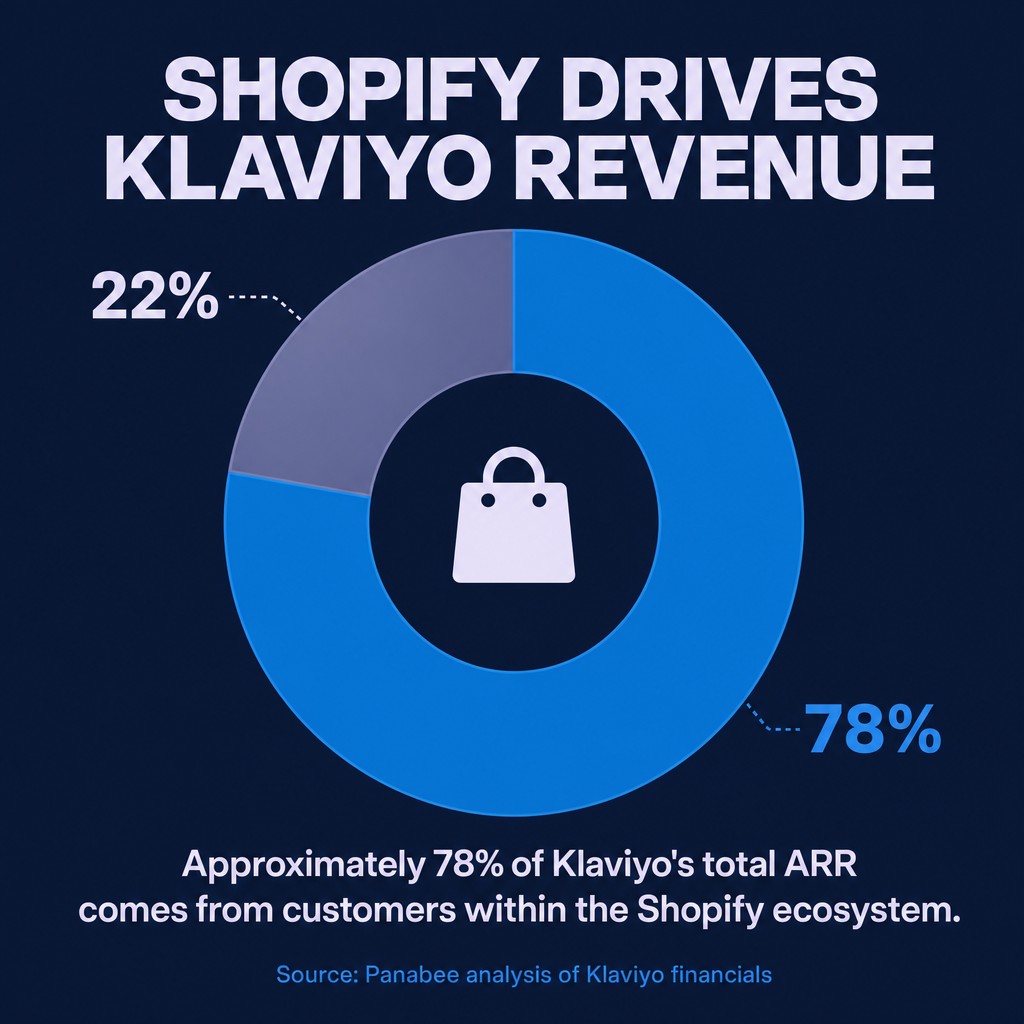
The Klaviyo Shopify integration connects your Shopify store to Klaviyo's email and SMS marketing platform, syncing customer profiles, order events, and behavioural data in real time so you can trigger automated flows, build precise segments, and personalise every message based on actual purchase history. According to Panabee's analysis of Klaviyo's financials, approximately 78% of Klaviyo's total ARR comes from customers within the Shopify ecosystem. That is not a coincidence. It means the integration is genuinely built for this combination, not bolted on.
Most setup guides stop at "install the app and you're done." That's where the problems start. Onsite tracking gets skipped. Subscriber sync settings get left on defaults that nobody checked. Flows get activated before the data is actually flowing. This guide covers the full setup, including the parts that trip people up, so you can get it right first time.
What the Klaviyo Shopify Integration Actually Does
The Klaviyo Shopify integration creates a bidirectional data sync between your Shopify store and Klaviyo, passing order events, customer profiles, and on-site behavioural signals in both directions so your email marketing and SMS flows have accurate, real-time data to act on.
That bidirectional part matters more than it sounds. It is not just Shopify pushing data into Klaviyo. Klaviyo can also write consent status back to Shopify, keeping your subscriber records consistent across both platforms. Most stores only think about the inbound flow and then wonder why their Shopify customer list and their Klaviyo list keep drifting apart.
On the Shopify side, the events that get tracked include Placed Order, Ordered Product, Fulfilled Order, Cancelled Order, Refunded Order, and Checkout Started. Each of those events carries with it the full customer profile data: email address, name, location, order value, product details, and more. That is the raw material for every segment and every automated flow you will build.
On the behavioural side, once you enable onsite tracking, Klaviyo also captures Viewed Product, Added to Cart, and Active on Site. Those three events are what power browse abandonment and added-to-cart flows. Without them, you are leaving some of your highest-converting automations completely dark.
As a Klaviyo Master Platinum Partner, we have set this integration up across dozens of ecommerce brands. The stores that get the most out of it are the ones that treat data sync as ongoing infrastructure, not a one-time install task.
Before You Begin: What You Need in Place
Connecting Klaviyo to Shopify requires four things before you touch any settings: an active Shopify store, a Klaviyo account (the free tier works for initial setup), admin-level access on both platforms, and a clear decision on which Klaviyo list your Shopify email subscribers will sync into.
That last point is the one people overlook. If you skip the list decision upfront, you will end up with subscribers in your default list mixed with manually imported contacts, and your segmentation will be a mess from day one. Create a dedicated list called something like "Shopify Subscribers" before you start. You can always merge later, but separating later is painful.
A note on Klaviyo pricing: the free plan covers up to 250 contacts and 500 monthly email sends. It is enough to test the integration and build your first flows, but most active Shopify stores will move onto a paid plan quickly. Klaviyo's pricing scales by contact count, and Klaviyo's fiscal year 2025 results show the platform ended the year with over 193,000 customers globally, so the pricing structure is well-documented and publicly available on their site.
One more prerequisite: make sure your Shopify store URL is in the mystore.myshopify.com format. You will need to enter this exact URL during the Klaviyo connection step. Using a custom domain will not work at that stage.
How to Integrate Klaviyo with Shopify: Step-by-Step Setup
The Klaviyo Shopify integration setup takes under 15 minutes when you follow the steps in order, and the process runs entirely through the Shopify App Store without requiring any developer involvement.
Step 1: Install Klaviyo from the Shopify App Store
Go to the Shopify App Store and search for Klaviyo. Click "Add app" on the official Klaviyo listing. Shopify will ask you to confirm the permissions Klaviyo needs: read and write access to customers, orders, and marketing events. Accept these. Without them, the data sync will not function.
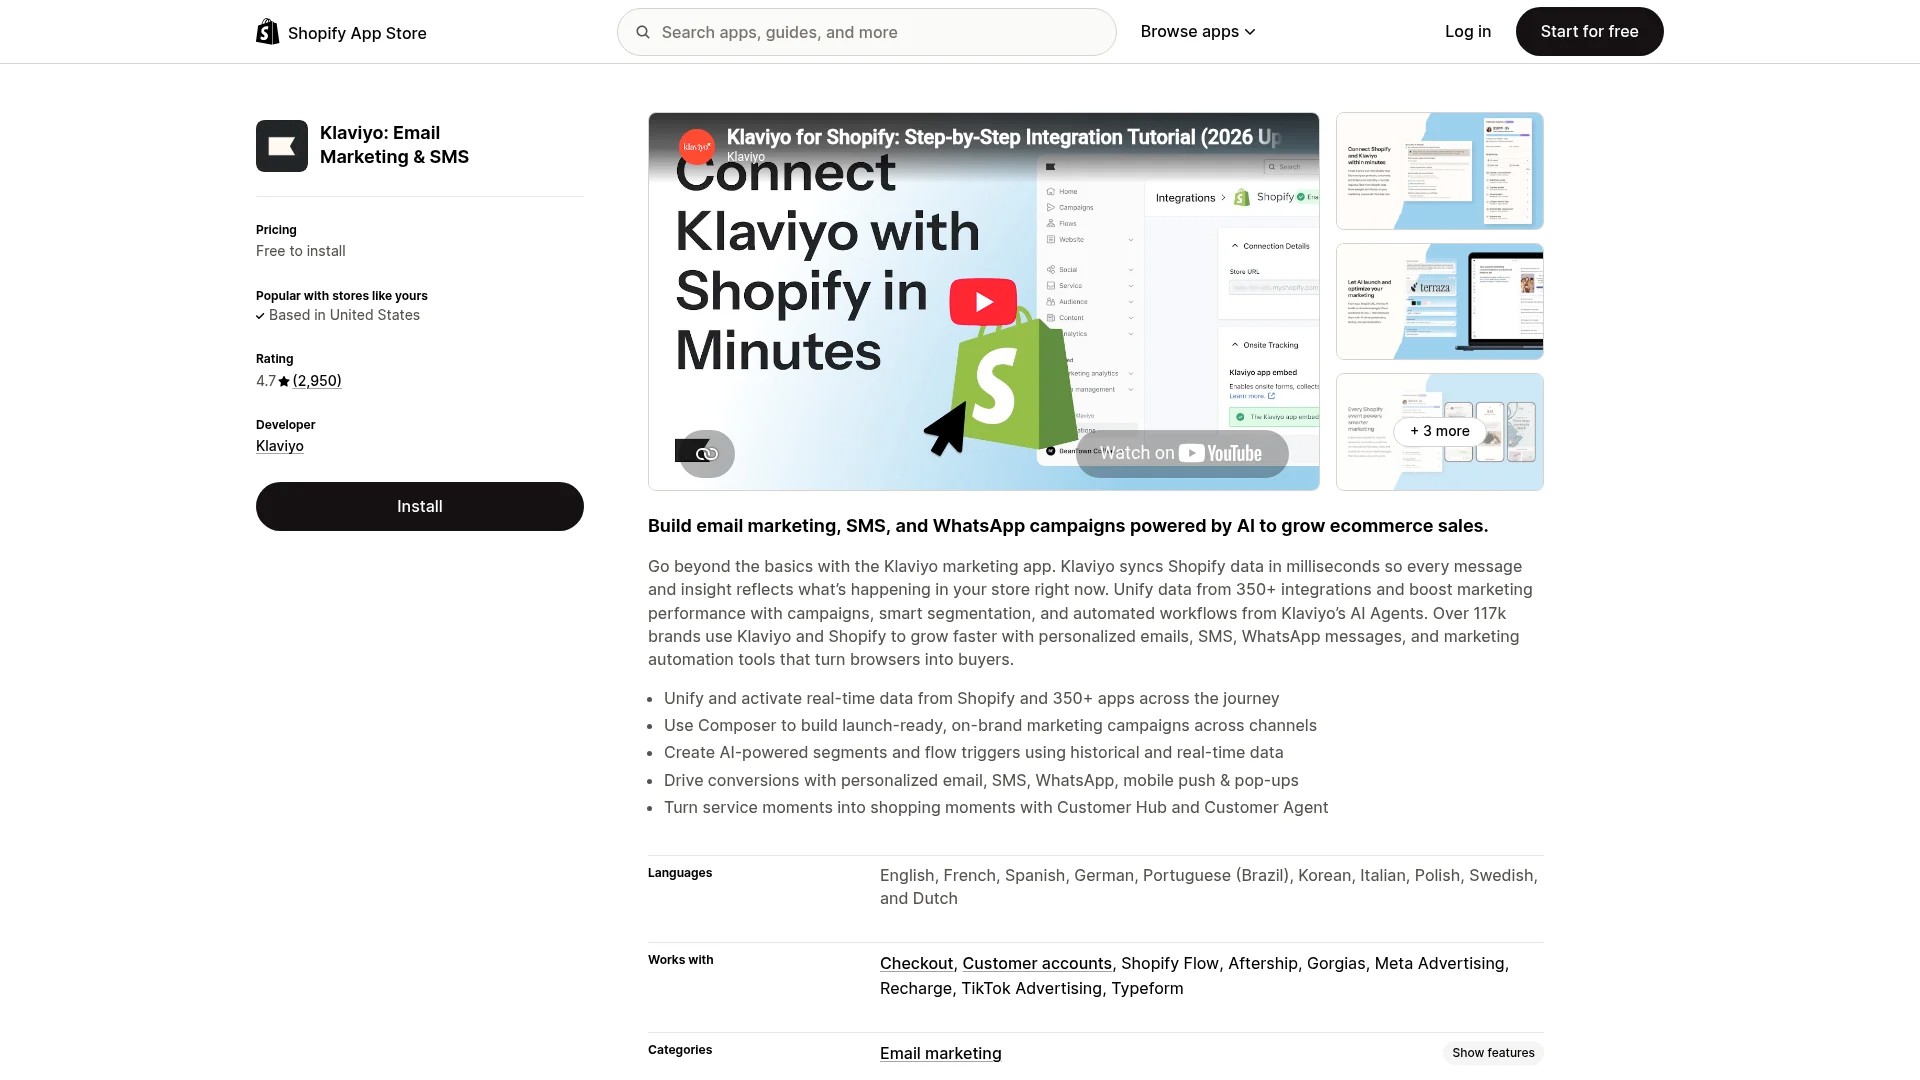
If you already have a Klaviyo account, you will be prompted to log in during the install flow. If you are new to Klaviyo, you can create an account at this stage. Either way, the install process connects your Shopify store to your Klaviyo account automatically once you authenticate.
Step 2: Connect Your Store URL in Klaviyo
Inside Klaviyo, go to Integrations in the left-hand navigation and select Shopify. Enter your Shopify store URL in the mystore.myshopify.com format. This is the internal Shopify URL, not your branded domain. Click "Connect to Shopify."
Klaviyo will redirect you back to Shopify to confirm the connection. Once confirmed, the integration status in Klaviyo should show as active. If it does not, the most common cause is a permissions conflict from a previously installed Klaviyo app that was not fully removed.
Step 3: Configure Your Subscriber Sync Settings
This is the step that most guides rush past. Once connected, Klaviyo will ask which list your Shopify email subscribers should sync into. Select the dedicated list you created before starting. Then decide on double opt-in. For most Shopify stores, single opt-in is the right call for email subscribers who have already checked out. Double opt-in is better for cold list-growth flows, not for existing customers.
Set the same list selection for SMS subscribers if you are using Klaviyo's SMS offering. Separating email and SMS lists from the start keeps your consent records clean.
Step 4: Set Historical Data Sync
Klaviyo will offer to sync your historical Shopify order data. Do it. This backfills customer profiles with past purchase events, which means your segments and flows will have meaningful data to work with from day one rather than starting from scratch. For large stores with years of order history, this sync can take a few hours. Let it run.
Step 5: Verify the Data Sync Is Working
Place a test order on your Shopify store using a real email address (not your primary business email). Wait a few minutes, then check Klaviyo under Profiles. You should see a new profile created with the Placed Order and Ordered Product events attached. If those events appear, your core data sync is functioning correctly.
If the profile does not appear within 10 minutes, check the integration status page in Klaviyo for error messages. The most common issue at this stage is a conflicting app or a permissions scope that did not save correctly during install.
How to Enable Onsite Tracking for Your Shopify Store
Onsite tracking in Klaviyo captures on-site behavioural events including Viewed Product, Added to Cart, and Active on Site, and it requires activating the Klaviyo app embed inside your Shopify theme settings rather than adding any code manually.
This is the part that gets skipped most often. The Klaviyo Shopify integration connects the data layer, but onsite tracking is a separate activation step. And without it, browse abandonment flows, added-to-cart flows, and behavioural segmentation simply will not work.
Activating the Klaviyo App Embed
In your Shopify admin, go to Online Store > Themes. Click "Customise" on your active theme. In the theme editor, look for "App embeds" in the left-hand panel. Find the Klaviyo entry and toggle it on. Save the theme. That is it. No code, no developer needed.
Once the app embed is active, Klaviyo will start capturing Viewed Product and Added to Cart events for identified visitors (people who have previously clicked a Klaviyo email link or submitted a form on your site). Anonymous visitors are not tracked until they identify themselves.
Confirming Onsite Tracking Is Live
To verify tracking is active: visit a product page on your store while logged into a browser where you have previously clicked a Klaviyo email. Wait 2-3 minutes, then check the corresponding profile in Klaviyo. A Viewed Product event should appear. If it does, onsite tracking is working.
If it does not appear after 5 minutes, the most likely culprit is a cookie consent banner blocking the Klaviyo script before the visitor accepts. Check your consent management platform settings and make sure Klaviyo is categorised under "functional" or "marketing" cookies with appropriate consent handling in place.
Configuring Data Sync Settings Between Klaviyo and Shopify
The Klaviyo Shopify data sync covers six core order event types and continuously updates customer profiles, but several sync settings need manual configuration to ensure the data reaching your flows is clean and complete.
Most stores get the basic sync working and then stop. The result is customer profiles that are technically present but missing the context that makes segmentation useful. A profile that shows "Placed Order" but has no product category data, no CLV, and no predicted next order date is not much use for personalisation.
Custom Properties and Tags
Klaviyo pulls in Shopify customer tags automatically. If your Shopify store uses tags to identify wholesale customers, VIP accounts, or specific cohorts, those tags appear in Klaviyo as profile properties and can be used directly in segments and flow filters. Check that your Shopify tags are consistent before relying on them in Klaviyo, because typos and formatting variations in tags are a frequent source of segment errors.
Consent Sync Back to Shopify
Enable the bidirectional consent sync in Klaviyo's Shopify integration settings. This writes unsubscribe events back to Shopify so that a customer who opts out in Klaviyo is also updated in Shopify. Without this, you risk sending marketing to someone who has already unsubscribed, which is both a deliverability risk and a compliance issue. Given that the DMA is a partner of ours, keeping consent records tightly synchronised is something we consider non-negotiable.
For stores selling into the EU, this consent sync is not optional. It is the mechanism that keeps your Klaviyo and Shopify consent records aligned under GDPR.
Key Automation Flows to Set Up After Integration
The Klaviyo Shopify integration enables six core automated flows out of the box, with abandoned cart and checkout recovery flows typically delivering the highest immediate revenue return for most Shopify stores.
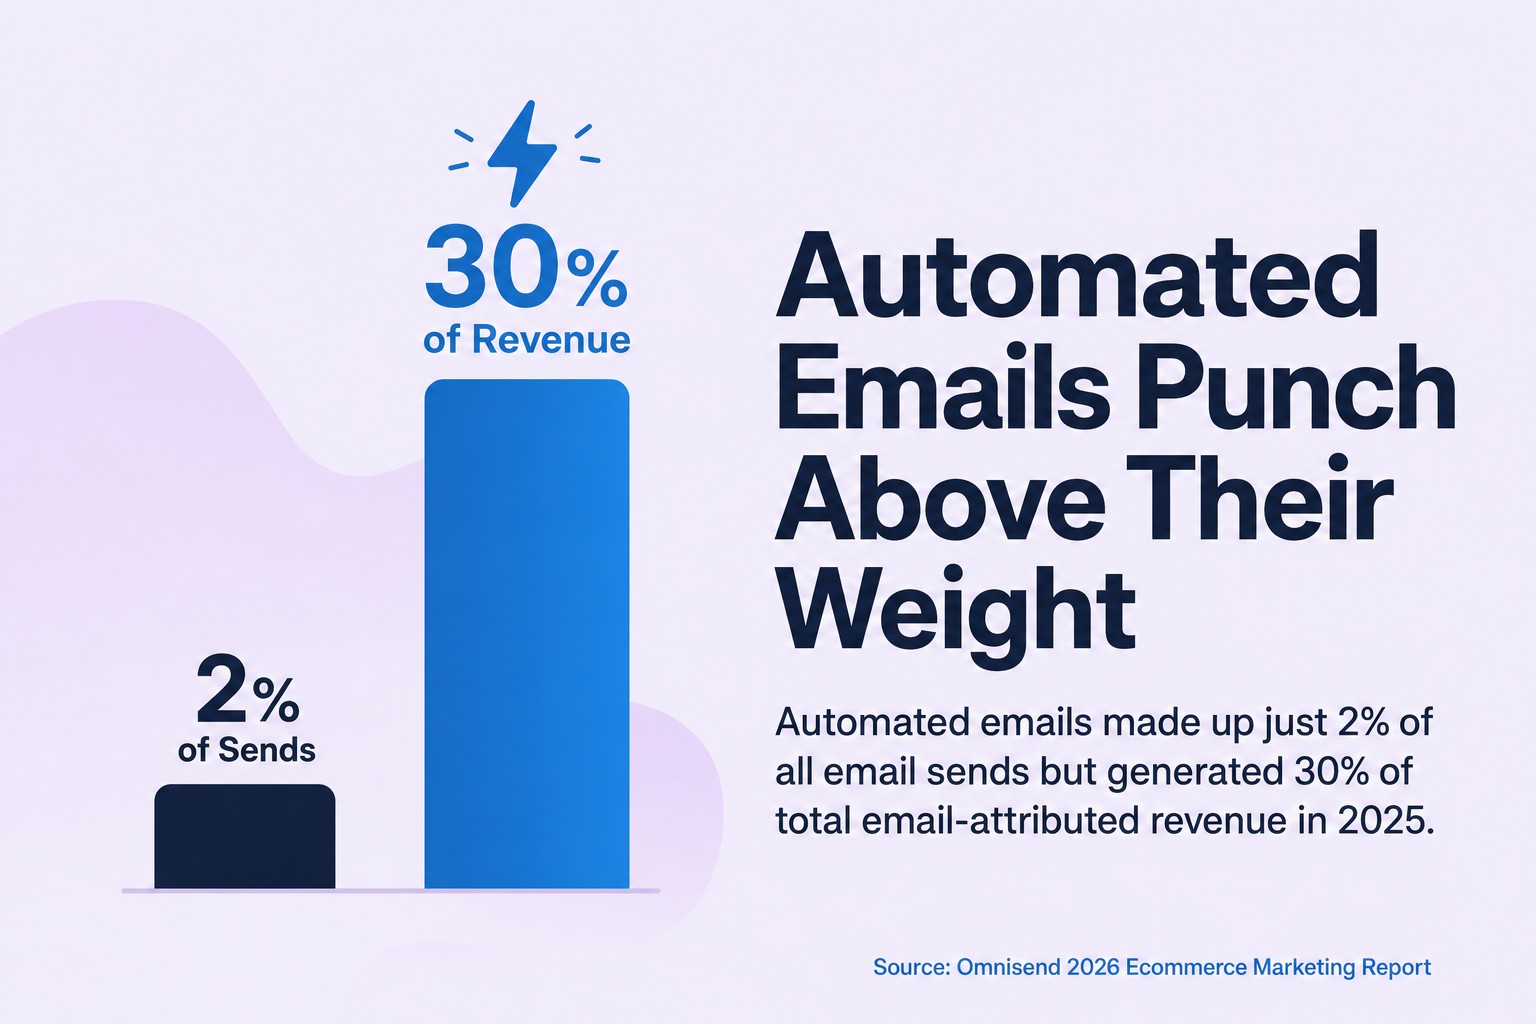
Automated emails make up a small share of total email volume, but their revenue contribution is outsized. Omnisend's 2026 ecommerce marketing report found that in 2025, automated emails made up just 2% of all email sends but generated 30% of total email-attributed revenue. That ratio should tell you where to spend your setup time first.
Abandoned Cart and Checkout Recovery
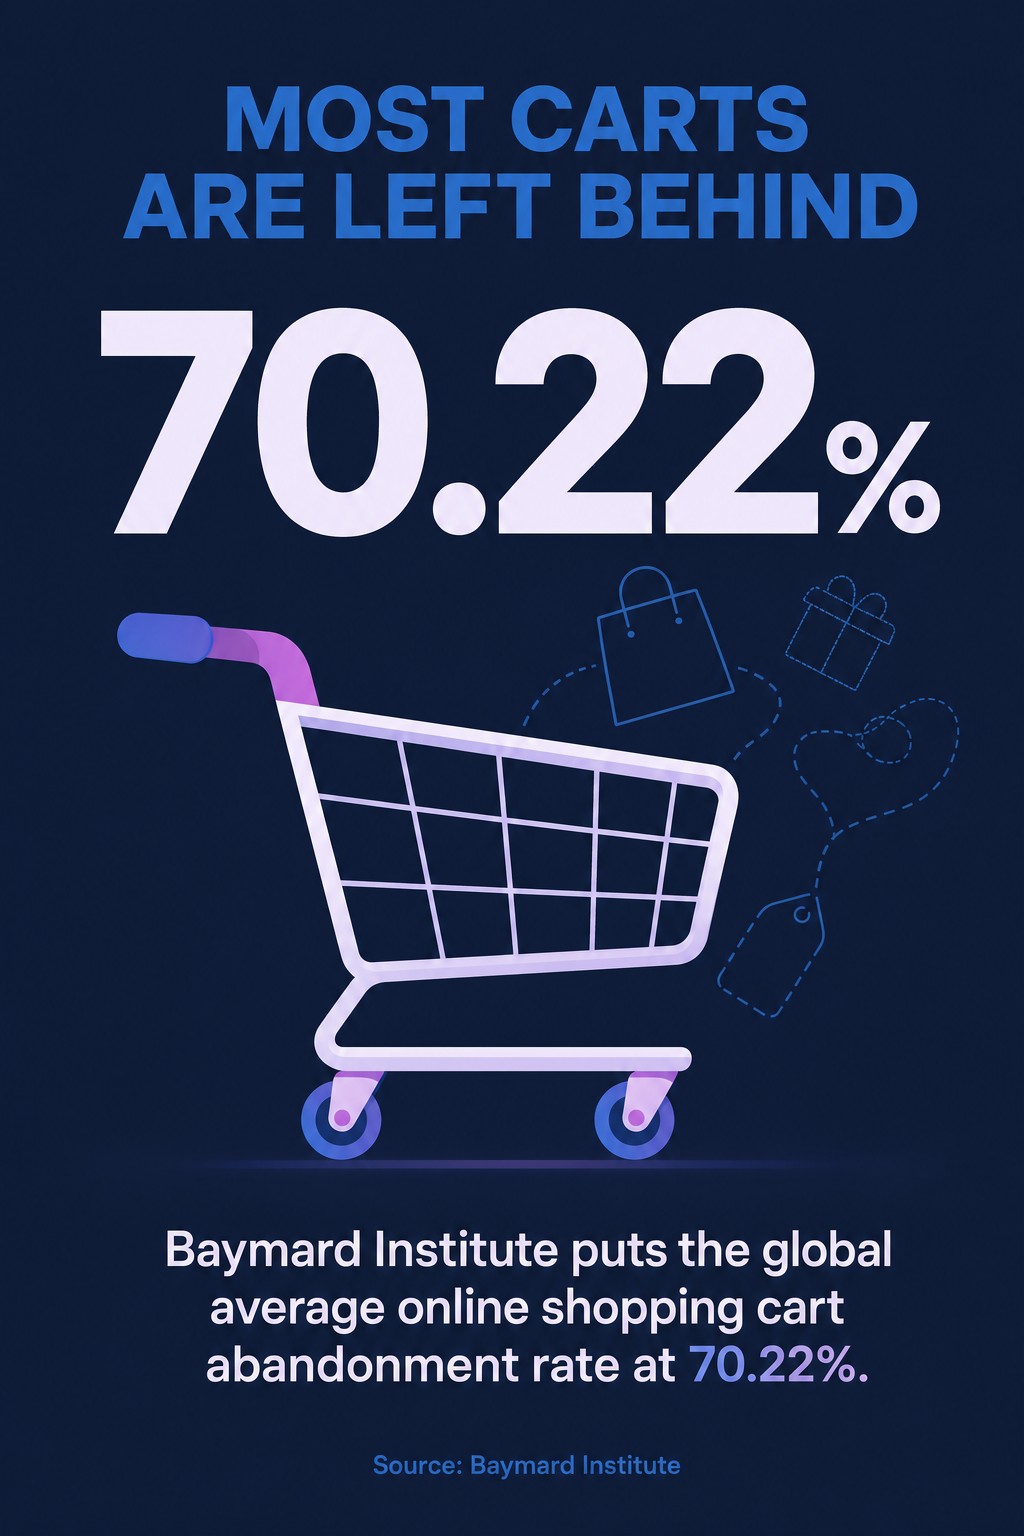
The abandoned cart flow triggers from the Checkout Started event and targets shoppers who began checkout but did not complete their purchase. Baymard Institute's research on cart abandonment rates puts the global average online shopping cart abandonment rate at 70.22%. That is a significant volume of potential revenue that a well-built flow can partially recover.
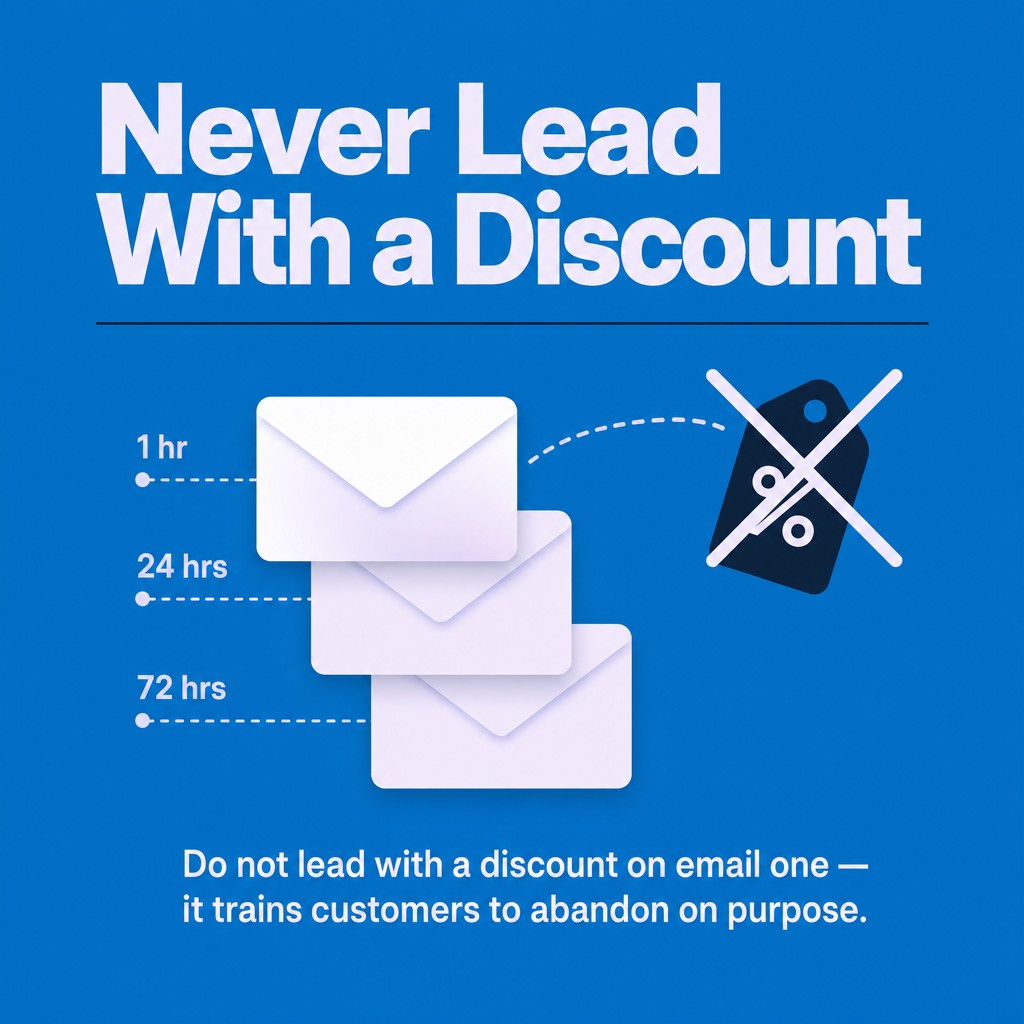
Build this flow with at least three emails: one sent 1 hour after abandonment, one at 24 hours, and one at 72 hours. The first email should be a straightforward reminder with the cart contents. The second can introduce social proof or a review. The third is where you consider an incentive if your margins support it. Do not lead with a discount on email one. It trains customers to abandon on purpose.
For stores with SMS enabled, add an SMS message at the 30-minute mark before the first email. That sequence consistently outperforms email-only in our experience working with ecommerce brands. If you want to see the full range of automation options available, our email automation toolkit covers over 100 trigger-based sequences.
Welcome Series
The welcome series triggers when a new subscriber joins your Klaviyo list for the first time. This is the highest open-rate flow in most accounts. Waste it with a generic "thanks for signing up" and you have missed your best chance to convert a new subscriber into a first-time buyer.
Structure your welcome series across at least 5 days: Day 0 (immediate) introduces the brand and sets expectations. Day 2 highlights your bestsellers or key categories. Day 4 addresses common purchase objections. Day 6 offers social proof. Day 8 introduces an incentive if they still have not purchased. Each email should have one clear CTA, not four.
Post-Purchase and Win-Back Flows
The post-purchase flow triggers from the Placed Order event and is where you build the relationship that turns a first-time buyer into a repeat customer. Use it to set delivery expectations, introduce complementary products, and ask for a review once the product has been received.
The win-back flow targets customers who have not purchased in a defined window, typically 90-180 days depending on your average purchase frequency. Use Klaviyo's predictive analytics to refine the trigger window based on actual customer behaviour rather than picking an arbitrary date. The Expected Date of Next Order property in Klaviyo is built for exactly this.
For a broader view of how segmentation powers all of these flows, our guide to email marketing list segmentation tactics covers the underlying logic in detail.
Troubleshooting Common Klaviyo Shopify Integration Issues
The most frequent Klaviyo Shopify integration problems fall into four categories: failed data sync, missing onsite tracking events, duplicate customer profiles, and subscriber consent mismatches, each with a specific fix that does not require developer access.
Events Not Appearing in Klaviyo
If Placed Order or Checkout Started events are not appearing after a test order, check three things in sequence. First, confirm the integration is showing as "Active" in Klaviyo's Integrations page, not "Disconnected." Second, check that the Shopify app has the correct permissions (Customers, Orders, and Marketing Events at minimum). Third, check whether a third-party checkout app is bypassing Shopify's native checkout events. Custom checkout tools sometimes break the standard Klaviyo event flow.
Onsite Tracking Not Firing
If Viewed Product events are not appearing despite the app embed being active, the issue is almost always one of two things. Either the visitor is not identified (they have never clicked a Klaviyo link or submitted a form), or a cookie consent banner is blocking the Klaviyo script. For the consent issue, check your consent management platform and ensure Klaviyo's scripts are permitted under the relevant consent category before testing again.
Duplicate Customer Profiles
Duplicate profiles in Klaviyo typically appear when a customer places an order with a different email address than the one on their existing Klaviyo profile. Klaviyo creates a new profile for each unique email. Use Klaviyo's profile merging tool to consolidate these manually, or set up a suppression flow that identifies profiles with the same phone number and flags them for review. This is a housekeeping task, not a sign that the integration is broken.
Subscriber Consent Mismatches Between Platforms
If your Shopify subscriber count and your Klaviyo list count keep diverging, check whether the bidirectional consent sync is enabled. It is off by default in some account configurations. Also check whether your Shopify checkout is collecting email consent in a way that Klaviyo recognises: the "Accept email marketing" checkbox at checkout needs to be the Shopify-native consent field, not a custom field added by a third-party app.
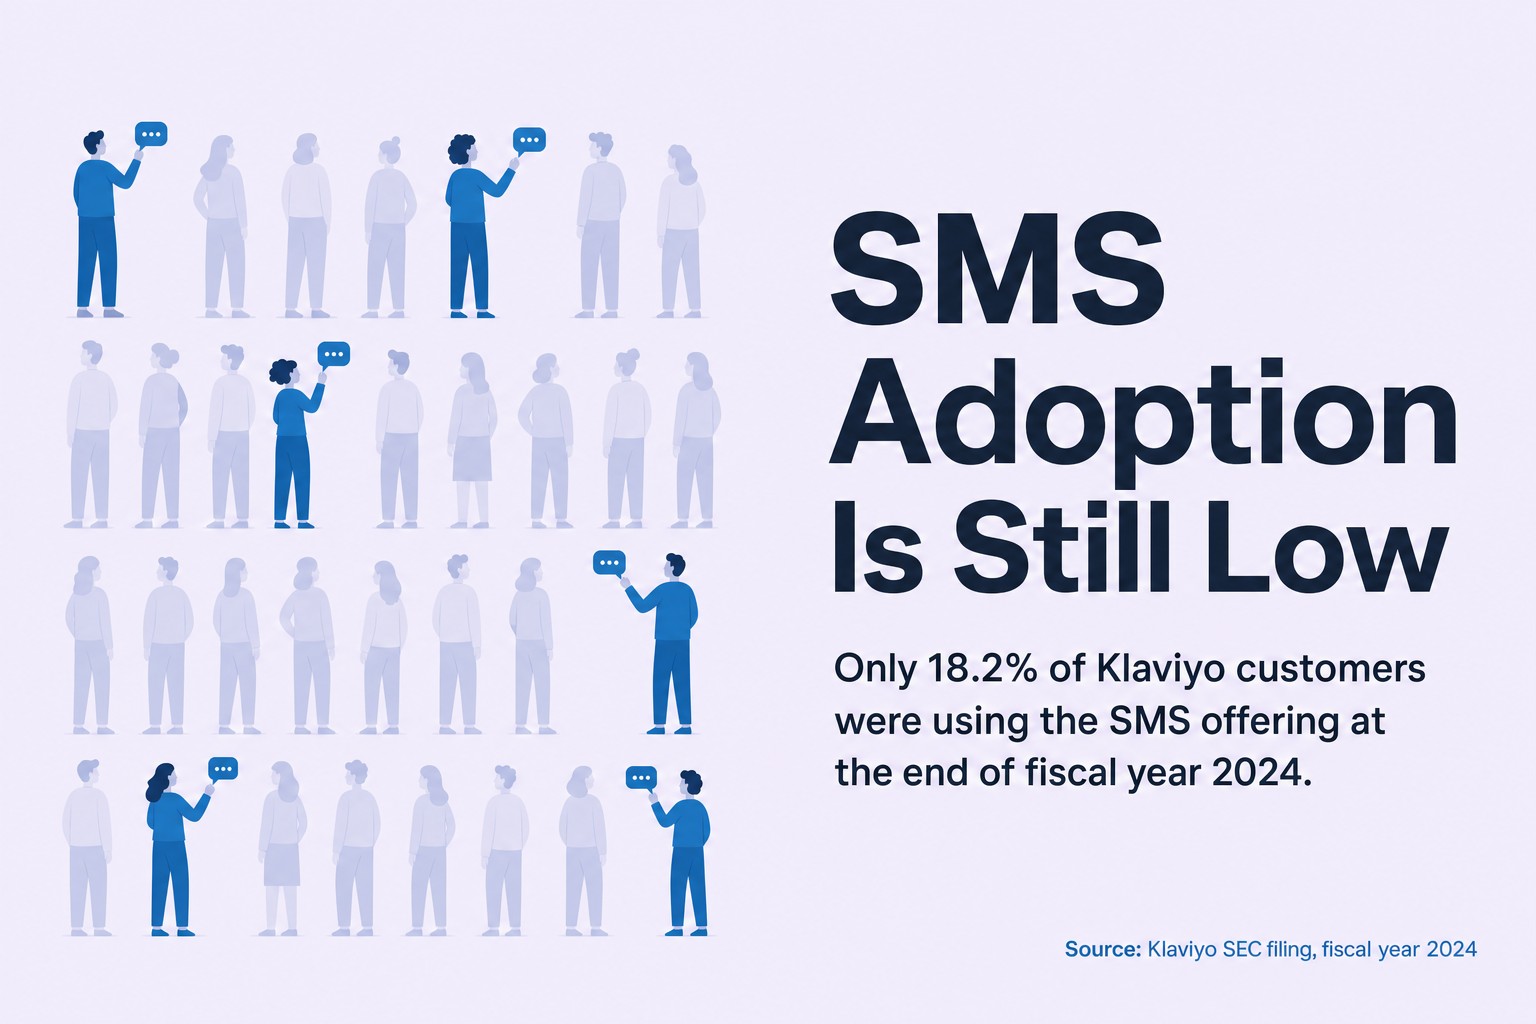
SMS consent is even more specific. Only 18.2% of Klaviyo customers were using the SMS offering at the end of fiscal year 2024, according to Klaviyo's SEC filing for fiscal year 2024. If you are collecting SMS consent at checkout, confirm it is tied to a compliant opt-in mechanism that records consent correctly in both Klaviyo and Shopify.
Klaviyo Shopify Integration FAQs
Does the Klaviyo Shopify integration work without a developer?
Yes. The entire Klaviyo Shopify integration setup, including app embed activation for onsite tracking, is done through the Shopify App Store and Klaviyo's settings interface. No code editing is required. This is one of the reasons the integration is so widely adopted: the Shopify App Store install process handles authentication and permissions automatically.
What data does Klaviyo sync from Shopify?
Klaviyo syncs customer profiles (email, name, address, phone), order events (Placed Order, Ordered Product, Fulfilled Order, Cancelled Order, Refunded Order), checkout events (Checkout Started), and customer tags. With onsite tracking enabled, it also captures Viewed Product, Added to Cart, and Active on Site events for identified visitors.
How fast is the data sync between Klaviyo and Shopify?
Order events typically appear in Klaviyo within 1-2 minutes of being placed in Shopify. Onsite tracking events such as Viewed Product are near real-time for identified visitors. Historical data syncs, which run when you first connect or run a manual resync, can take several hours for large catalogues.
Can I sync both email and SMS subscribers from Shopify to Klaviyo?
Yes. The Klaviyo Shopify integration syncs both email and SMS consent from Shopify checkout. You configure separate list selections for email and SMS subscribers during the integration setup. Shopify's native checkout consent fields for both channels are recognised by Klaviyo automatically.
What is the best Klaviyo pricing plan for a Shopify store starting out?
Klaviyo's free plan covers up to 250 contacts and 500 monthly email sends, which is enough to test the integration and activate your first automated flows. Most active Shopify stores will outgrow the free tier once the welcome series and abandoned cart flows are running and the list starts to grow. Klaviyo's paid plans scale by active profile count, so costs track directly with list growth.
Does the Klaviyo Shopify integration support Shopify Markets and multi-currency stores?
Klaviyo syncs order data including the currency and locale associated with each order, which means you can segment by Shopify Market or currency and tailor your automated flows accordingly. Multi-language personalisation requires additional template configuration in Klaviyo but the underlying data is captured correctly from the integration.
Getting the Most from Your Klaviyo Shopify Setup
The Klaviyo Shopify integration is one of the most capable connections available in ecommerce, but the setup is where most brands leave money on the table. Getting the install right, activating onsite tracking via the app embed, configuring bidirectional consent sync, and building the five core flows (welcome series, abandoned cart, post-purchase, browse abandonment, and win-back) will put you in a stronger position than the majority of stores using this platform.
Segmentation is the multiplier. Once the data sync is clean and the events are flowing, the real work is building segments based on purchase history, product categories, and predicted behaviour, and using those segments to personalise every send. Sending the same email to your entire list is not a strategy. It is a waste of the data Klaviyo is working hard to collect for you.
If you want to see how this plays out across a full lifecycle strategy, our guide on improving customer retention for Shopify stores covers the flows and segmentation logic that drive repeat purchase. And if you are still deciding whether Klaviyo is the right platform for your store, our Klaviyo vs Mailchimp comparison lays out the trade-offs clearly.
Need help setting this up properly or building out the automation strategy behind it? Our email automation service covers the full Klaviyo Shopify setup, flow architecture, and ongoing optimisation. Speak to our team and we will tell you exactly what your store needs.